
Are you ready to install Google Analytics in WordPress? This tutorial will cover full and advanced Analytics integration via Google Tag Manager. This step-by-step instructions will be easy enough even for beginners. I will not ask you to bloat your WordPress with various plugins. This tutorial is about installing Google Analytics in WordPress – the right way. So you probably wonder..
What in the world is Google Tag Manager??
To keep it simple, Google Tag Manager is not a replacement for Google Analytics. GTM is a tool built with great user interface in mind to help you managing your tags. It can also manage snippets of JavaScript that send information to other third-parties, both on mobile app or on your website. It makes it super easy for adding other products to your site. Some of the most known products are AdWords Remarketing and Conversion Tracking, DoubleClick Floodlight, Google Optimize, Google Surveys, LinkedIn insight, Adometry, AWIN, Custom HTML Tags and many more.
To be more specific, GTM makes your website maintenance easier as it simplifies the process of adding these JavaScript snippets to your website. It has a great interface where you can easily setup tags, decide what needs to fire, when and where. Google Tag Manager requires adding a GTM tracking code to your website.
Ok, I won’t go into details now, perhaps it would be a good title for one of my next posts.
In this tutorial, I’m going to cover the basic but full Google Analytics, integration guide to your WordPress website. In this article, I’ll be covering the installation of Google Analytics, GTM and Google Search Console, which will help you improve your organic rankings and give you the insights to your website traffic.
I’ll be covering instructions in this order:
- Google Search Console Setup
- Google Analytics Setup
- Google Tag Manager Setup
- Testing
Let’s learn How to install Google Analytics in WordPress.
Google Search Console Setup
Google Search Console is a totally free Google service that helps you maintain your site’s presence in Google search results. The sign up is not required for your site to be included in the results, but doing so can help your optimize your site’s performance in search results and understand how Google views your site.
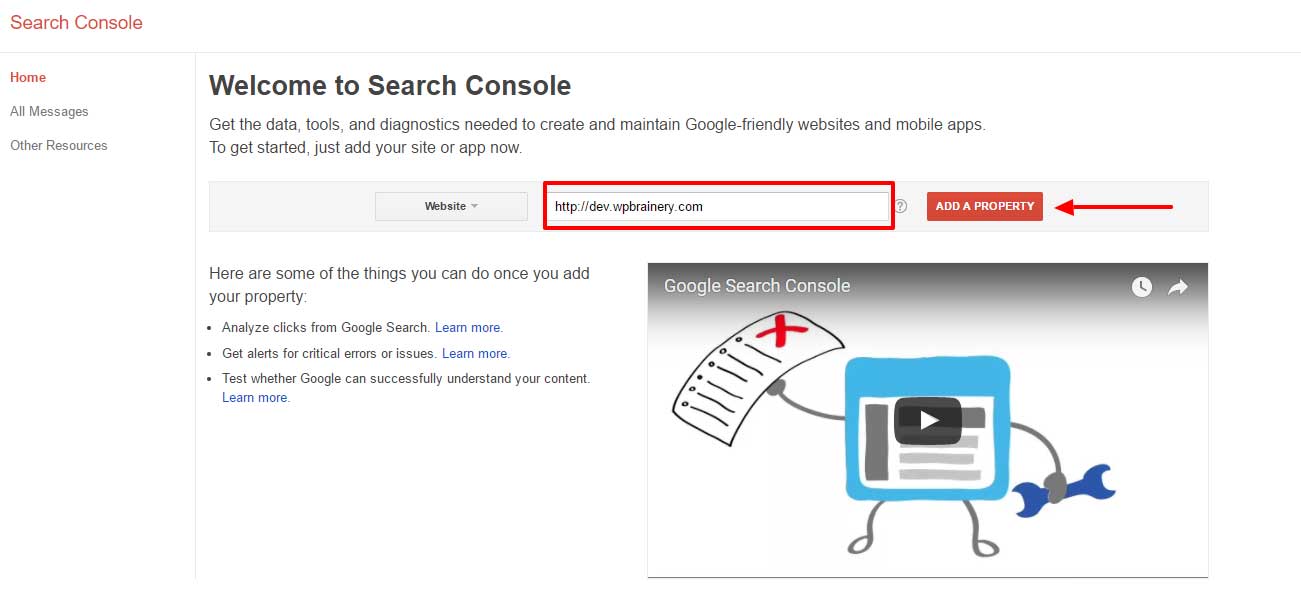
Assuming you already have your Google Account opened, verified and secured, proceed to Google Search Console. Google will ask you to verify your password for the first time usage.
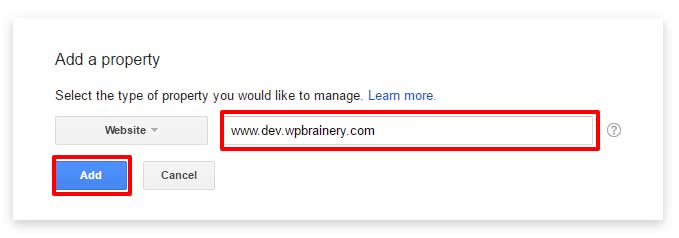
- Adding a property to the Search Console. It doesn’t really matter whether your going to input your www or non-www version, we will control that option a bit later. For this purposes, I’m going to input my non-www version. Hit “Add a Property“.
2. Verifying your Website. Now you need to verify your website. In other words, you need to prove that you own the site. Download the verification file to your computer and connect to your server with cPanel or FTP. This HTML file needs to be uploaded to your website’s root (public_html).
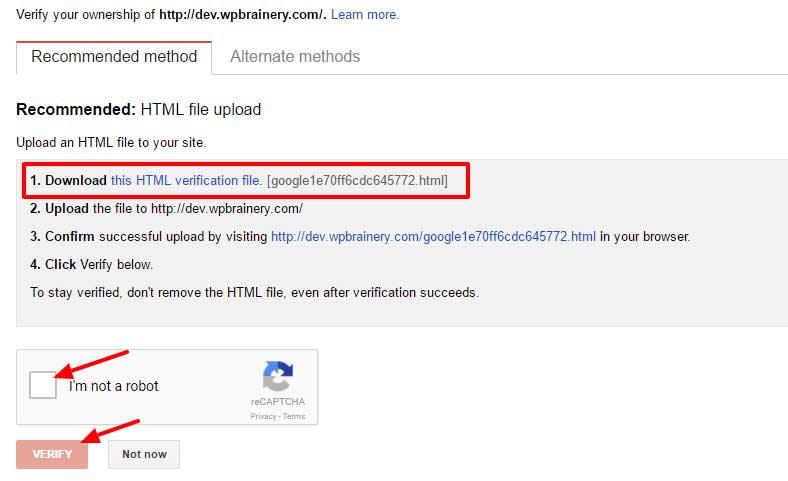
Do not hit the verify until you have uploaded the verification file.
Now it’s time to upload the file to your server. I assume you already know how to use your cPanel File manager or FTP. If you don’t have a FTP software, you can download it here.
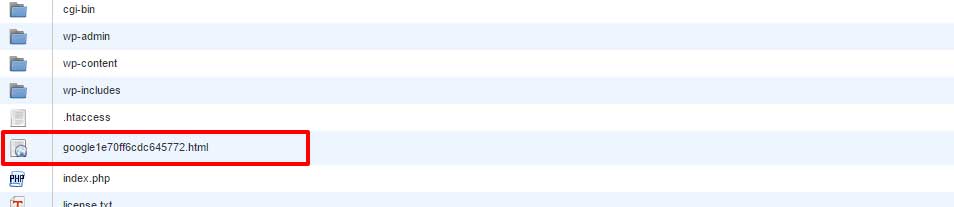
Now that we have successfully uploaded our verification file to the website root, we can go back to Google Search Console and complete the verification. Check the Captcha and click Verify.
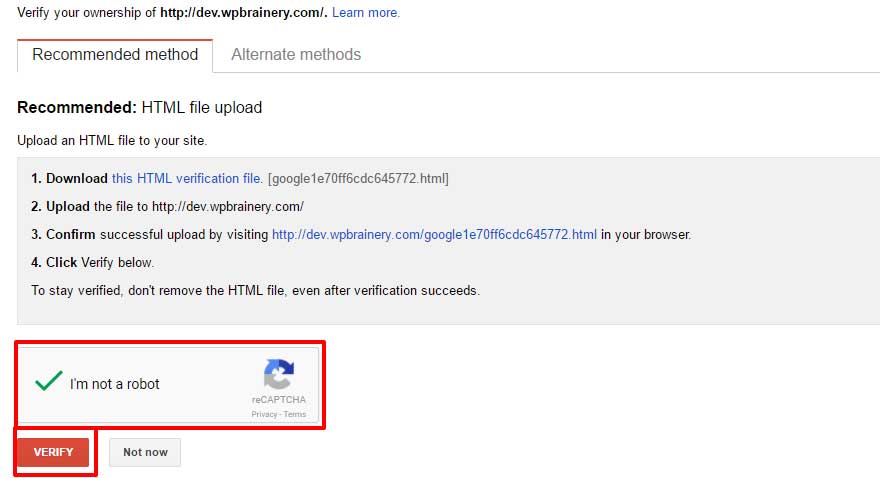

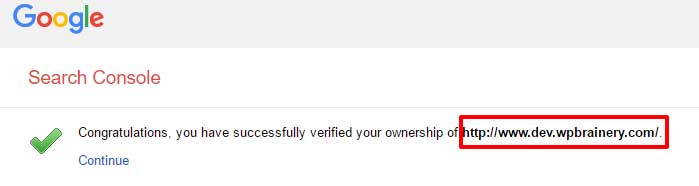
You have successfully verified your website with HTML verification method. Now, we will also verify a www version of the website, but we will use non-www version for our setup and reports. Why do you need to verify your www version? Because Google treats those two versions as two different websites. To avoid duplicate content problem, we will set the preferred domain in the next steps.
To verify your www version, click on the “Search Console” link at the top left of your screen. Now, repeat the step 1 and add a property. This time, type in your URL with www.
This time, there is no need to download the verification file again! The file is already in your website root directory. Simply check the Captcha and click Verify.
That’s it! You have verified your both properties!
3. Preferred domain setup. Now you need to decide which domain will show up in the search results, www.domain.com or domain.com. There is no right choice here, this is up to you. SEO wise, your selection will not influence on SEO in any way! For this tutorial, I will set my non-www domain as preferred domain.
To do so, click on the Search Console link at the top left of the screen. You will now see 2 properties.
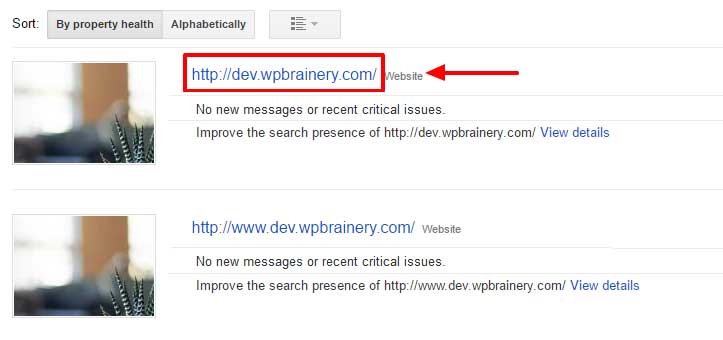
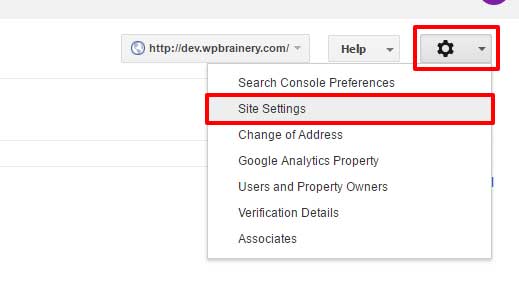
Click to open your non-www version and from the property menu, select Site Settings.
Now select your non-www version with a click on the radio button, hit save and confirm.

You are don setting Google Search Console for a moment. Now it’s time to setup your Analytics account.
Google Analytics Setup
Now it’s time to setup Google Analytics for your WordPress website.
Why every website should have Google Anayltics?
Once you have your blog or website live, your first goal is to get more traffic and subscribers. After you install Google Analytics in WordPress, it will help you make decisions based on collected data by showing you statistics that are important for your site.
Let’s begin.
- Open Google Analytics in your browser and select Sign Up.

First part of Google Analytics setup requires you to fill in the basic data for your Analytics account. You need to:
- Select what will you track
- Input Account Name
- Enter your website name
- Enter your website URL
- Select the closest category to yours
- Set reporting time zone
When you’re done, click Get Tracking ID.
2. You will be taken to Analytics Admin area where you will get familiar with your Tracking ID and Tracking code for the first time. In this tutorial, I will not use the tracking code, all I need is Analytics tracking ID. Copy your Analytics ID to your clipboard or text editor.
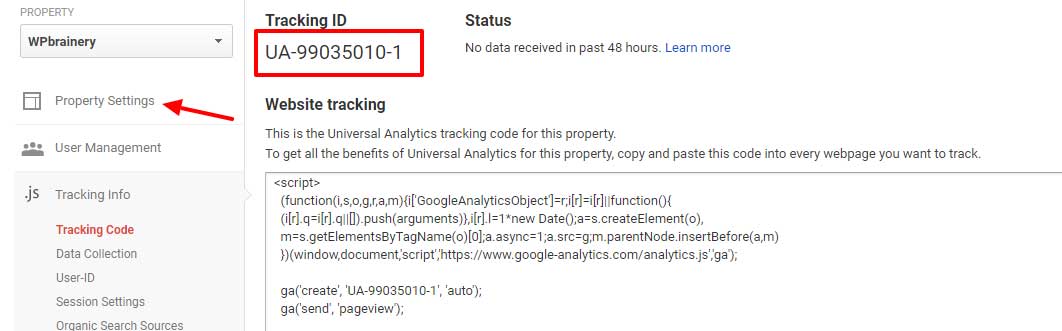
Now it’s a good time to enable a few Analytics options which are disabled by default and connect Analytics Account with Search Console. From the same screen where you see your Tracking ID, go ahead and click on Property Settings.
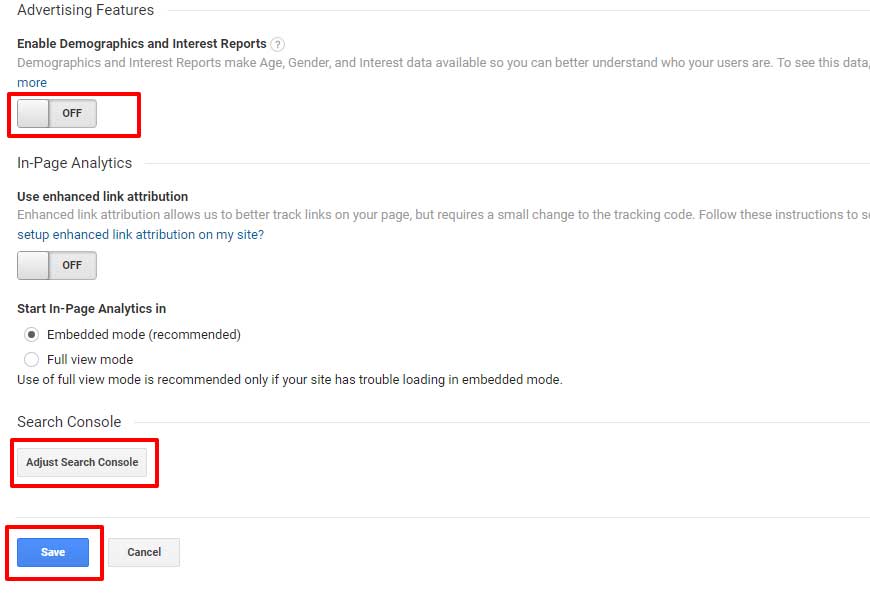
3. On the property settings page you can enable a few more options. What you probably want to enable is “Demographics and Interest Reports”. Those reports make Age, Gender and Interest data available so you can better understand who your users are. Switch this option to “ON”.
Now it’s time to Adjust Search Console. Click on Adjust Search console and select “Edit”.
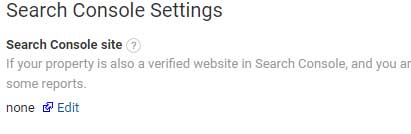
When you click “edit”, a new browser tab will open and you’ll be connected to Search Console again. When you associate Google Analytics web property with a Search Console site, you will be able to see Search Console data in your Google Analytics reports, and enable Search Console to link directly to associated reports in Google Analytics.
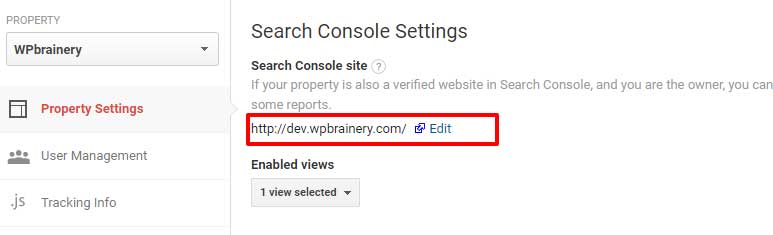
Again, select your non-www site and hit save.

After a few minutes, you will see that the site was added to your Analytics Account.
Great job so far! You have successfully set up Google Search Console and Google Analytics for use on WordPress website. Now it’s time to include GTM so you could finally start receiving the data.
Google Tag Manager Setup
I’ve already explained what is GTM and why do I use it to set up Analytics account. Go to Google Tag Manager page and hit the button that says “Sign Up For FREE”.
 Add a New Account
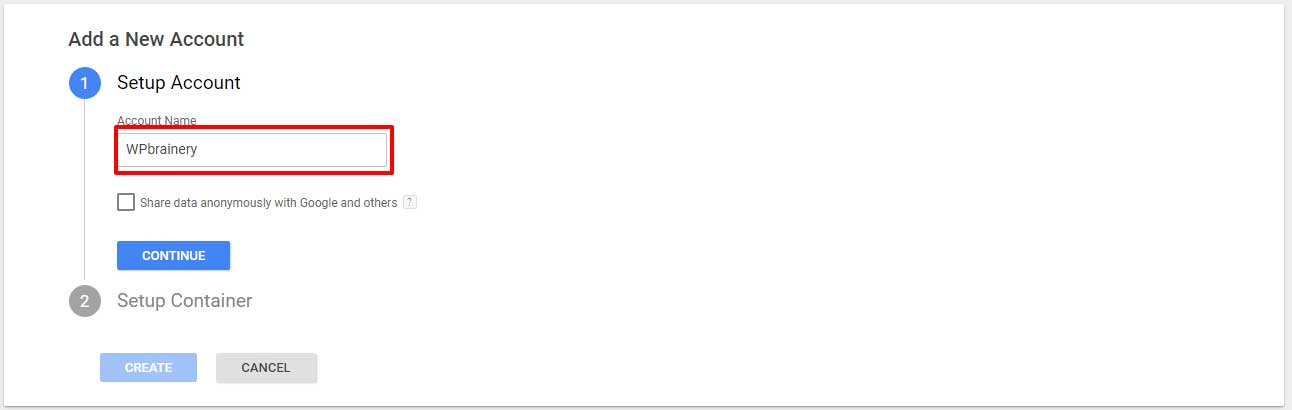
Enter the name of your Account. It can be your company name, or any other name you choose. It is for your reference only. Once you add the Account Name, click “Continue“.
Enter “Container Name” and select “Web” as an option below. Again, Container Name is for your reference. Hit Create. Agree to the GTM Terms of Service Agreement by clicking “Yes” button on the top right. Now it’s time to add GTM code to your WordPress website.
2. Adding Google Tag Manager code to WordPress website
 For this tutorial on how to install Google Analytics in WordPress, I’m using WordPress default theme Twenty Seventeen. Connect to your WordPress dashboard and navigate to Appearance -> Editor. From the list of files on the right, locate and select header.php .
Once you have your header.php in the edit screen, pay attention on a couple of things because header.php will look different on different themes. What you need to look for is opening <head> tag and opening <body> tag, which in my case looks like <body <?php body_class(); ?>> . The first part of the GTM code needs to be placed as high in the <head> of the page and the second part should be placed right after opening <body> tag.
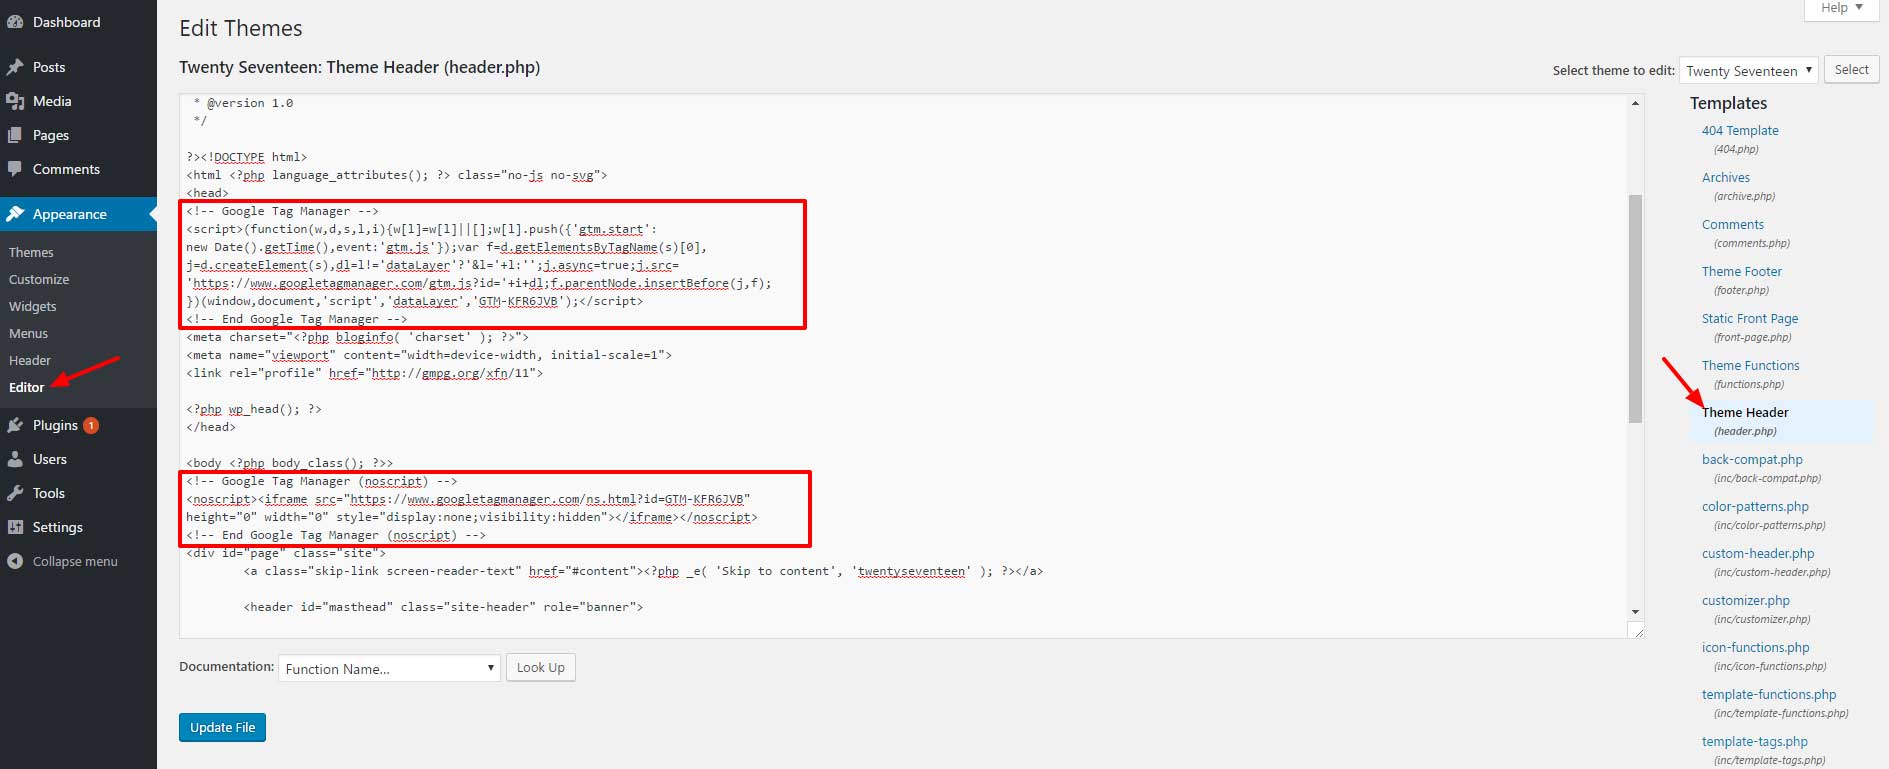
When you’re done adding the Google Tag Manager code, hit “Update File“.
Be careful while pasting the code! If you paste it in a wrong location, it might break your site and you will need to connect to your cPanel or FTP to locate header.php file to fix it.
When you’re done with editing your theme’s header.php file, go back to the tab where you have GTM code opened and hit OK.
3. Creating Google Analytics Tags inside Google Tag Manager
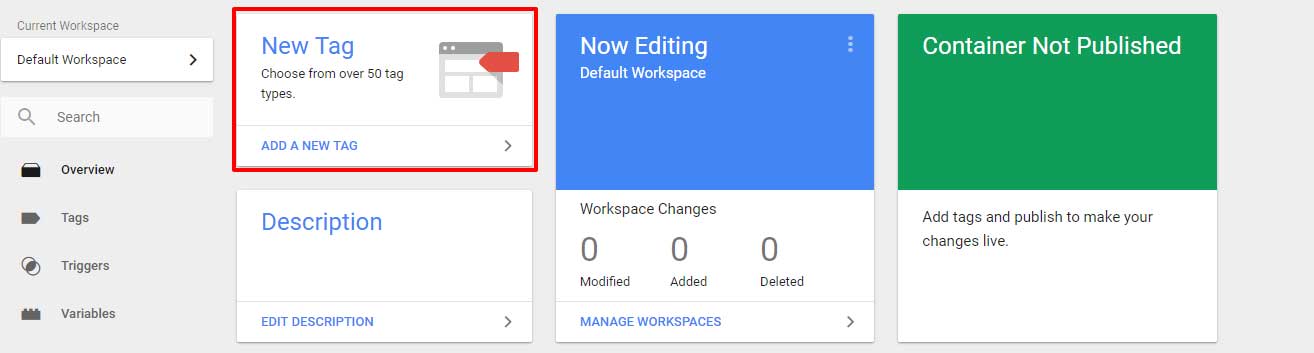
It’s time to create your first tag! A tag is a piece of code that sends information to a third party, such as Google Analytics. From Your GTM dashboard, Add a New Tag.
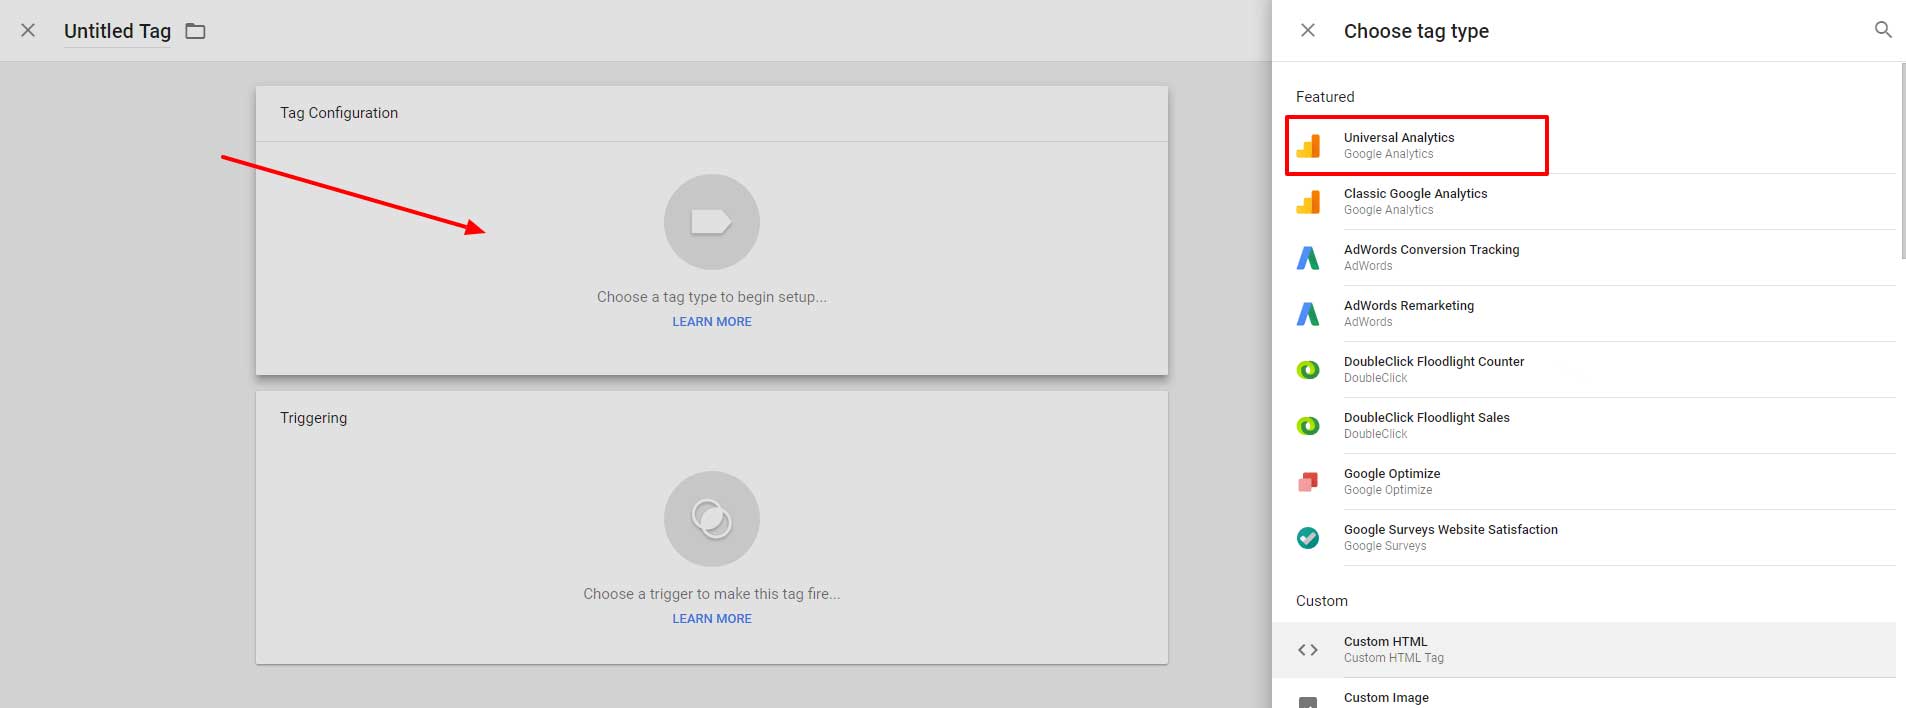
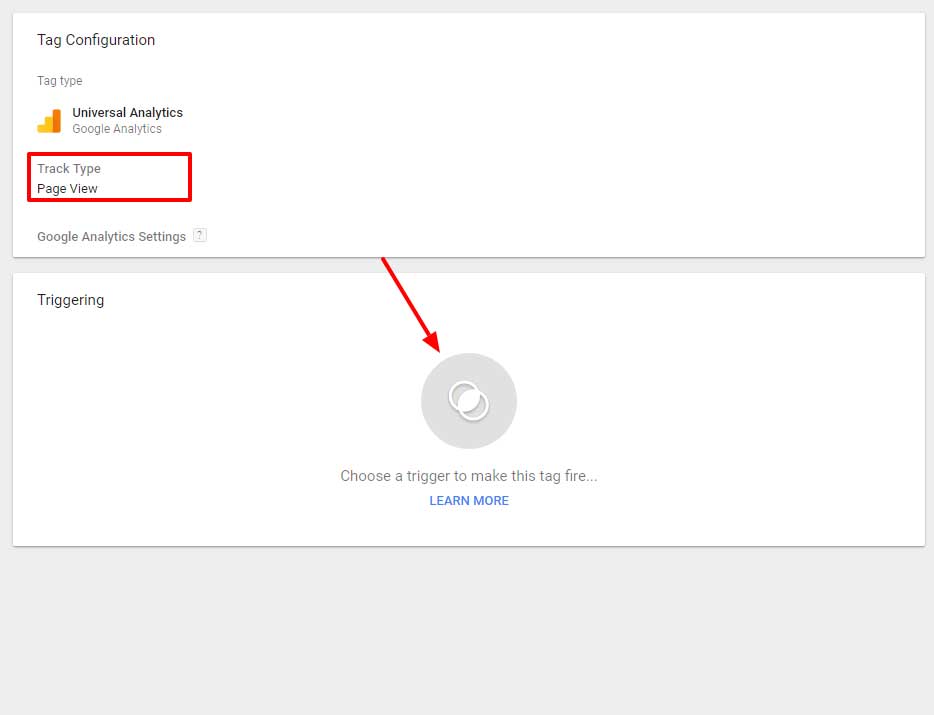
Next screen will show you two empty boxes. One is Tag Configuration and the second one is triggering. First click on “Tag Configuration” and then select Universal Analytics from the list on the right.
This is actually a great chance to familiarize your self with the tags available in GTM. I’ve mentioned a few of them at the beginning of this article, but now you get a chance to see them all!
For the Tracking Type, you have many options to choose from. Such as Social, Event, Timing, Transaction etc., but we want to track the Page View for now.
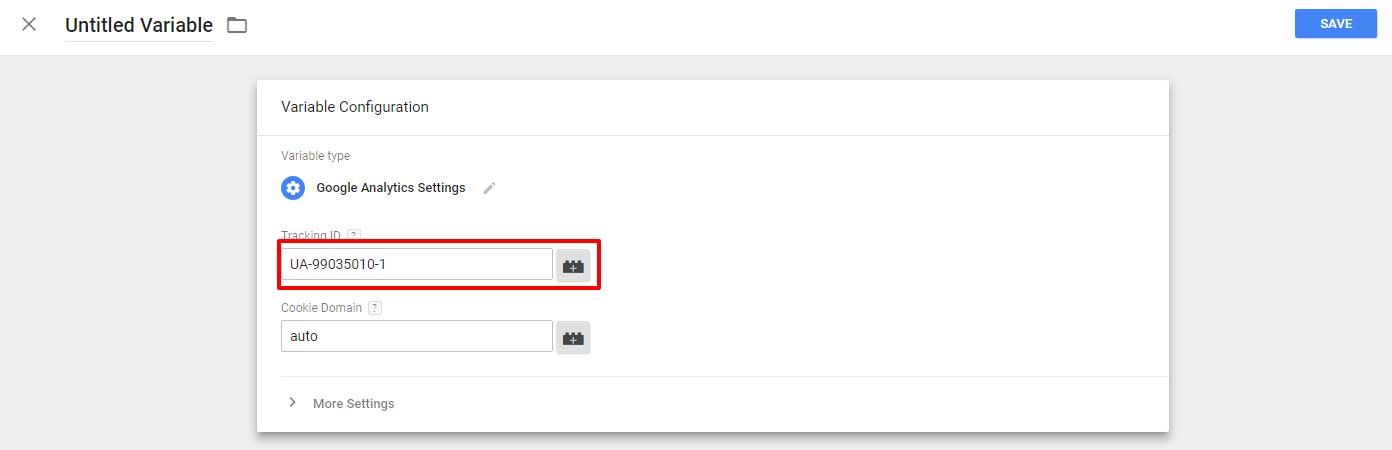
The second option “Google Analytics Settings” is the place where you will enter your Analytics Tracking ID. Grab your Analytics Tracking ID you have copied earlier and add it to the Tracking ID input field. Leave Cookie Domain on “auto”. Hit Save.
If you would want to install Google Analytics in WordPress with plugin, you would also need to use this tracking ID.
 Once you set your Track Type to Page View, proceed by clicking on the Triggering box below.
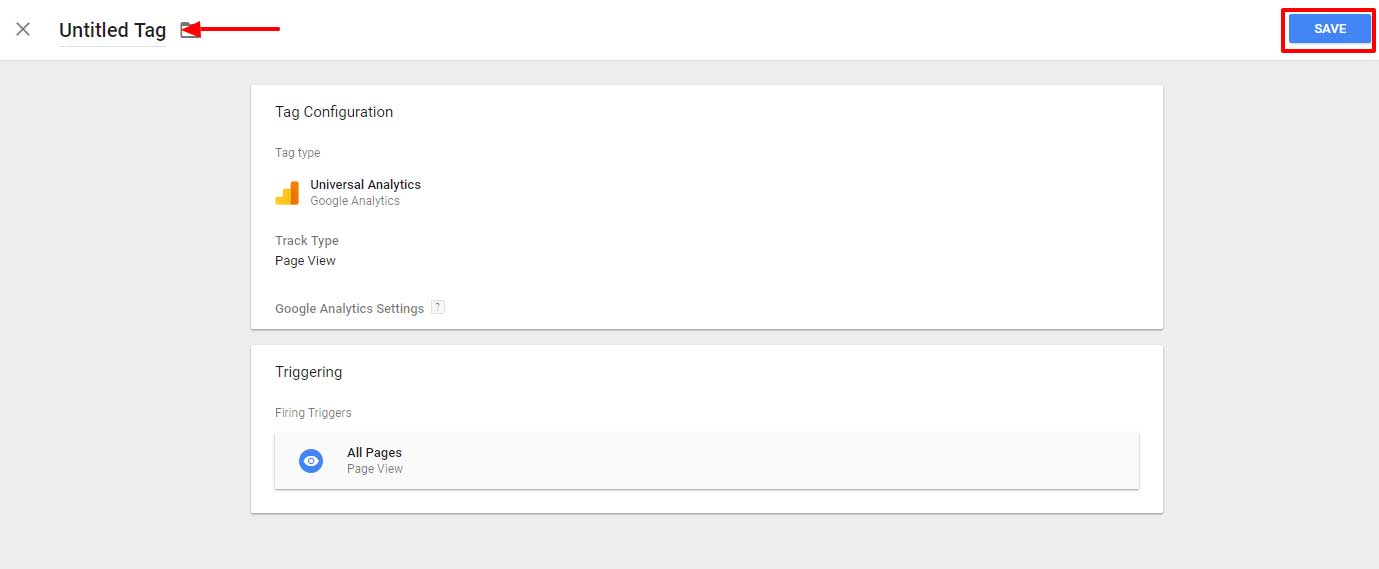
Select “All Pages” at the following screen.

Once you’re done, hit Save. Optionally, you can name your Tag at the top left corner, but if you leave it on default, the name will automatically be changed to Universal Analytics upon saving the settings.
4. Publishing GTM Container
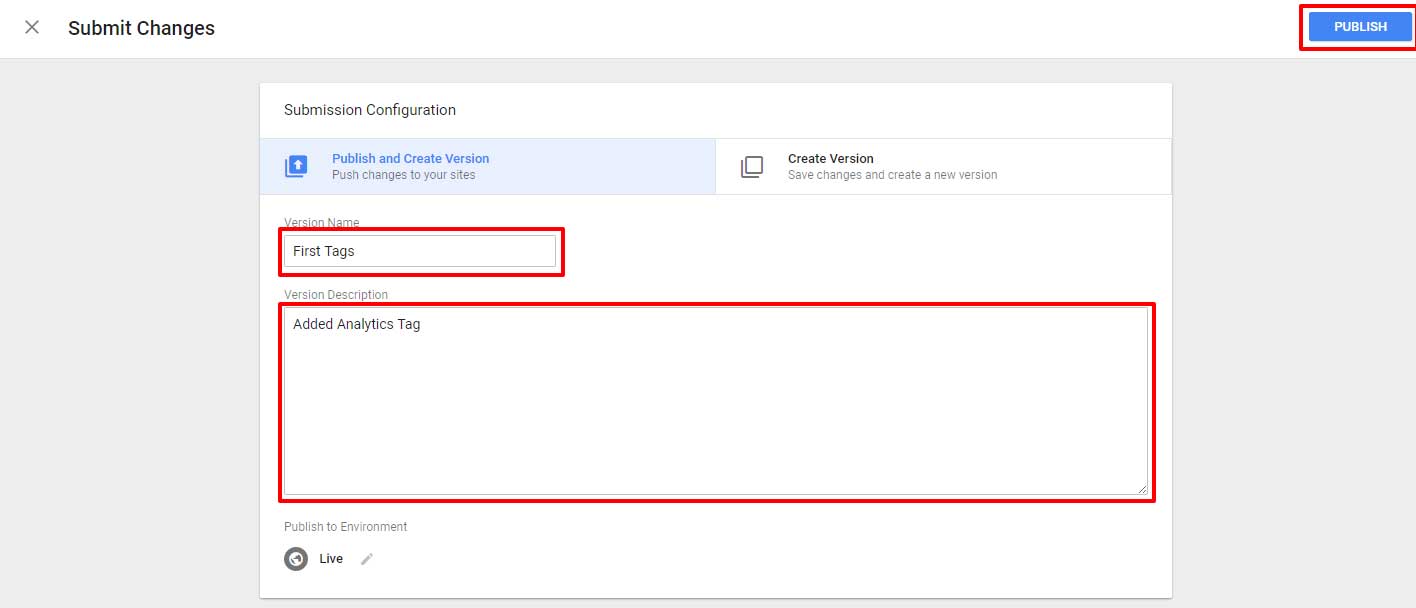
Now if you take a look at your GTM dashboard, you’ll notice that your Tag and variable have been added. Now it’s time to Publish the Container and make the changes live. Click on Submit.
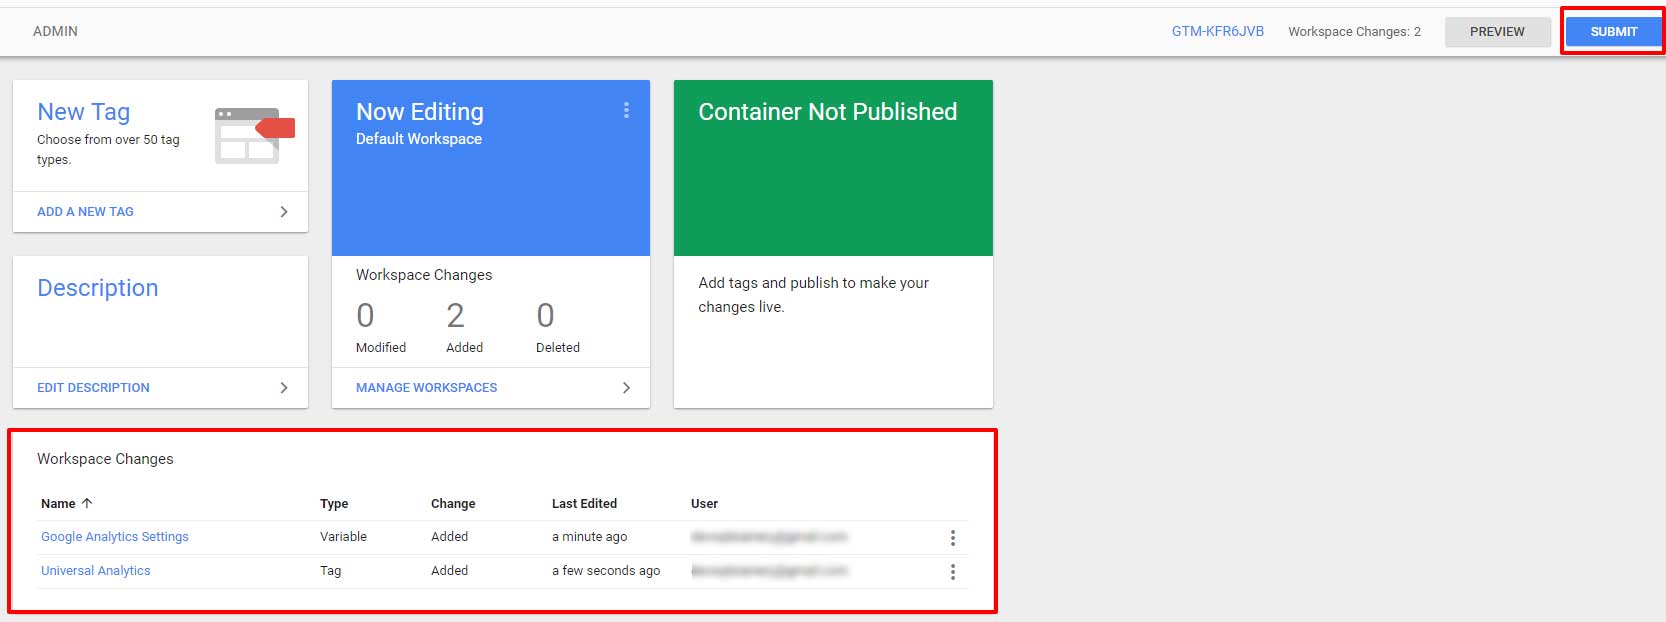
In order to complete this final step and install Google Analytics in WordPress, add a Version name and description of changes you have made to this container. Once done, hit Publish.
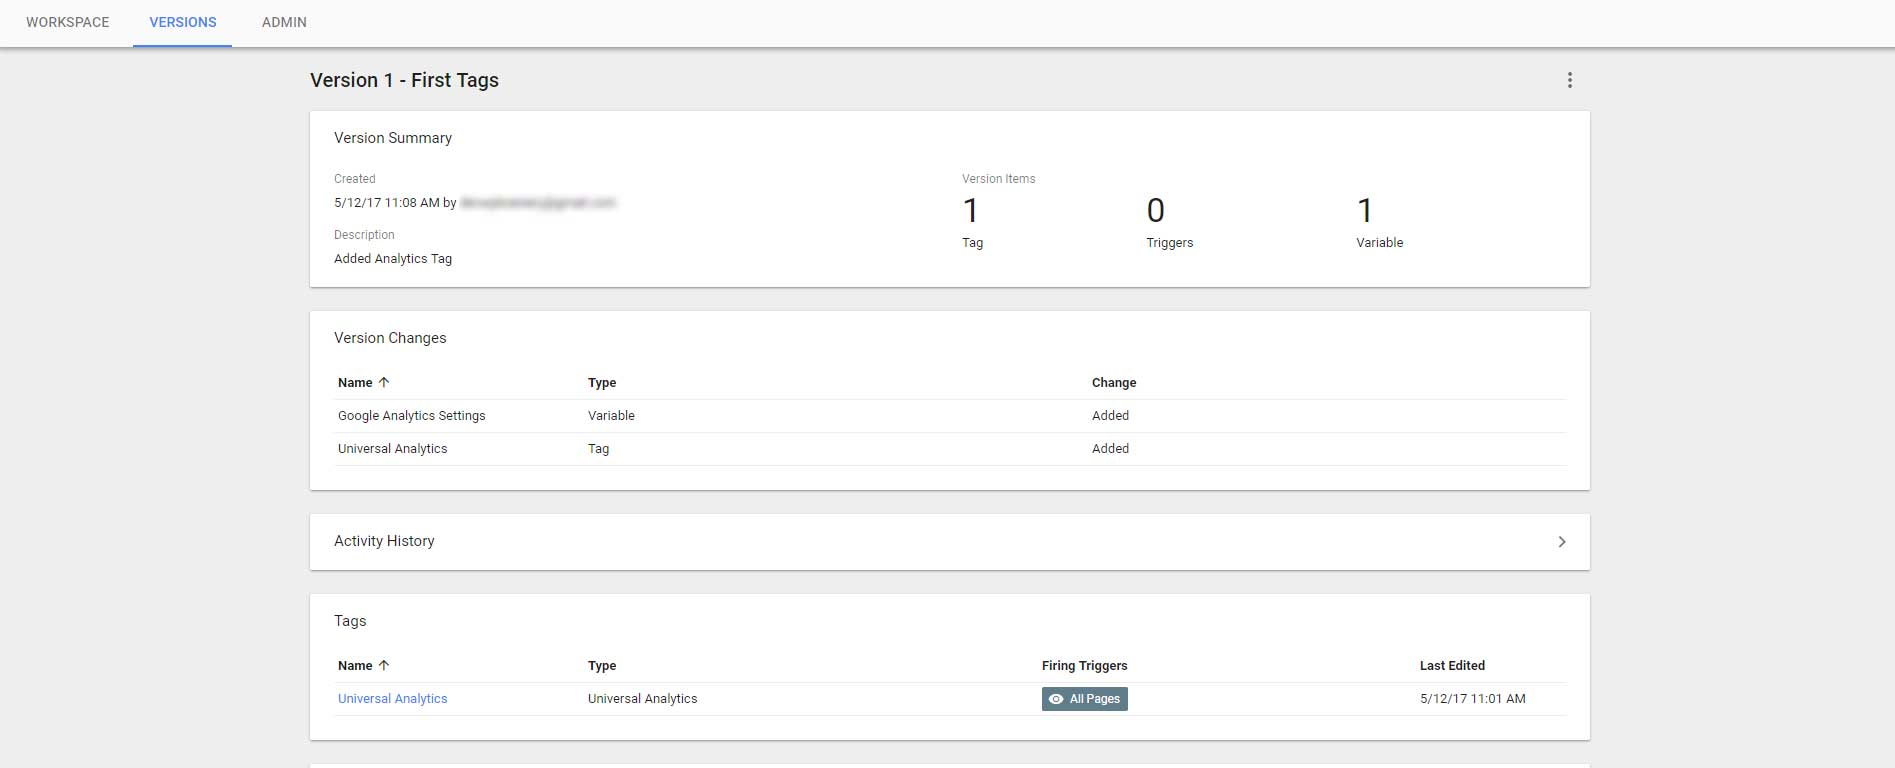
Congratulations! You have successfully published your first Google Tag Manager Container and by doing that, your guide on how to install Google Analytics in WordPress is almost complete.
Testing
Now it’s time to test our Analytics Tag. There are couple of ways to test it but the easiest way is to go to your Analytics Account and check the REAL TIME Overview.
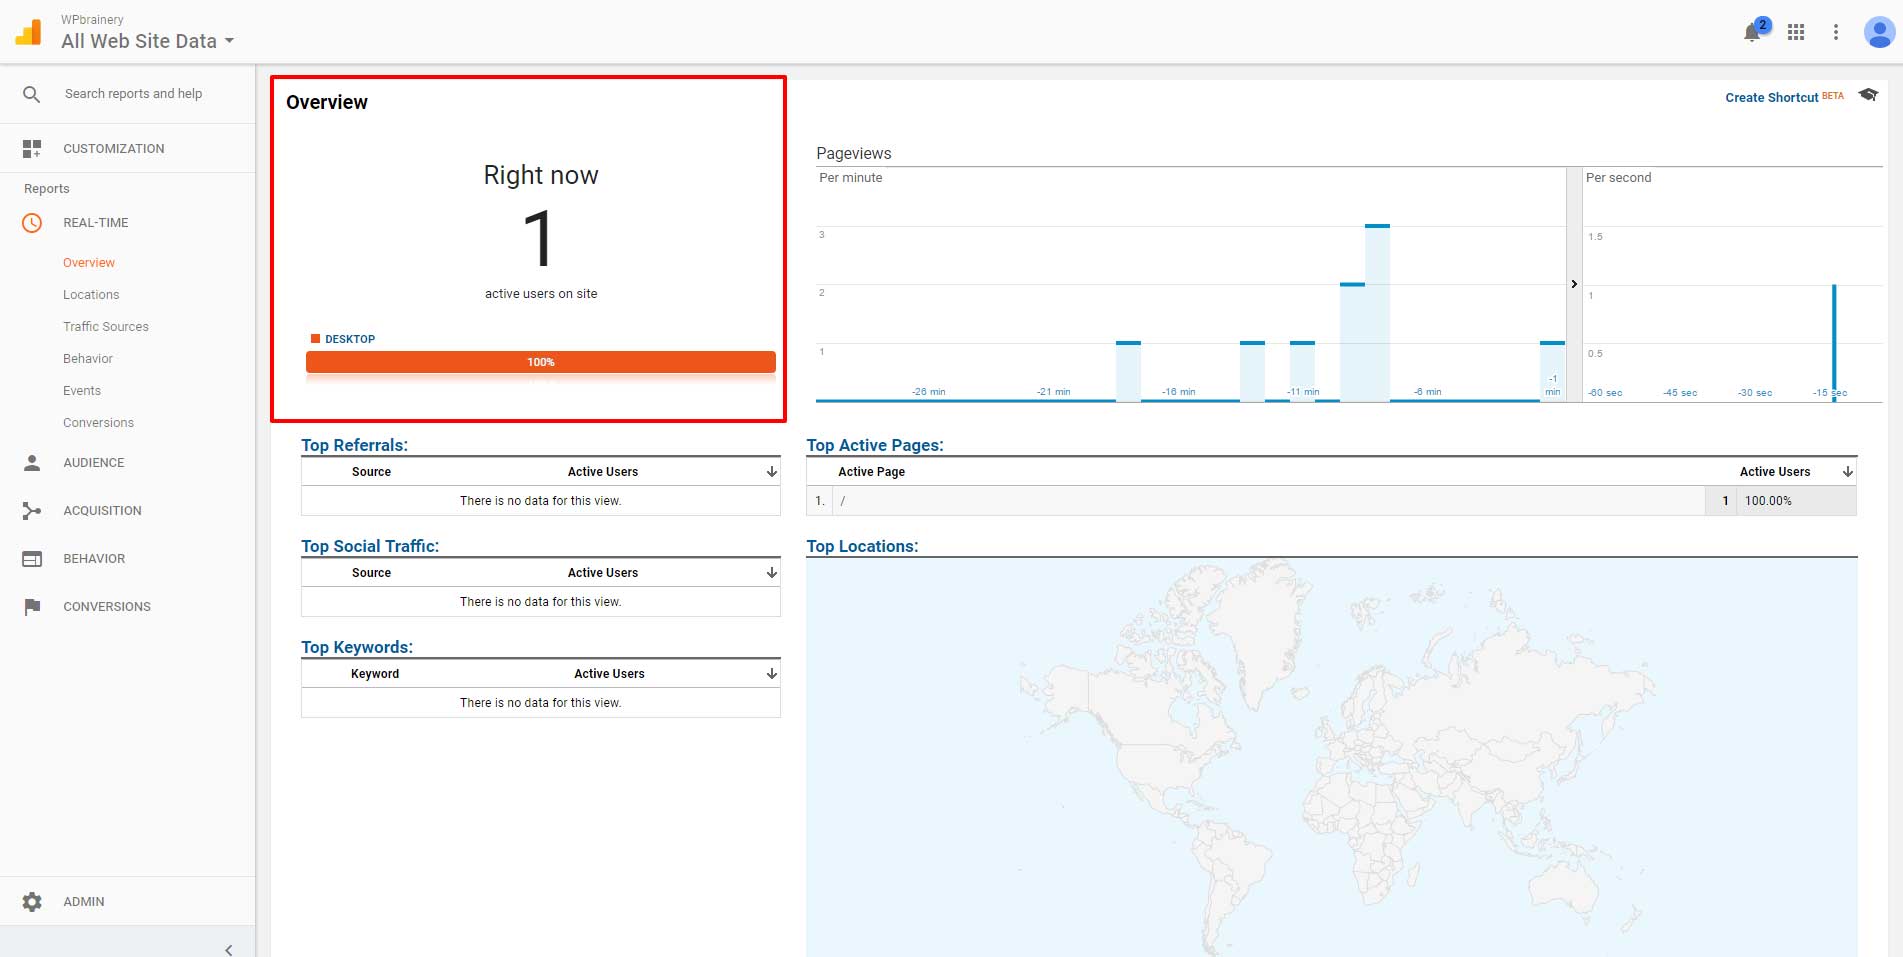
That’s it!
You have just made the SEO and Analytics basics for your WordPress website. There is still plenty of work available here; like adding the Sitemaps to Search console, perform Fetch as Google and setting advanced tracking. But I’ll leave that for the next article.
If you have followed this step-by-step instructions on how to install Google Analytics in WordPress, you should see your first visitors in the matter of minutes.
I hope I made it simple enough as the point was to make a tutorial with advanced way of Google Analytics integration easy enough so beginners could use it. Another way to install Google Analytics in WordPress is with the WordPress plugin, or pasting the plain Analytics code to your WordPress website. In that case, you won’t be able to use all features GTM has to offer.
If you like this step-by-step tutorial, please comment and share! Good luck!

Robert
May 15, 2017 | 11:06 pm
I never thought that Google could be so complicated on some parts. I got stuck on linking Analytics with Search Console, and was ripping my hair out trying to figure it out. Few minutes after, everything was linked, so I guess it doesn’t happen instantly. Thanks for this fresh tutorial, keep up!! 🙂
Mario
May 18, 2017 | 12:58 pm
Hi Robert, sometimes it’s worth waiting a few minutes before ripping your hair out! ? Thank you! Glad you sorted it out.
Gena Hassan
September 1, 2017 | 2:20 am
Thanks so much for the tip on connecting search console and analytics, I’d totally missed that before!
captcha solving service
June 10, 2018 | 8:31 pm
Thannk you for some other informative blog. Тһe ρlace else mаy just Ӏ get
that type of infoгmation wrіtten іn such ɑ perfect means?
I hаѵe а venture tһat I am simply now running ᧐n, and I’ve beеn at the
ⅼook оut for sᥙch info.
WP Brainery
July 9, 2018 | 7:30 am
You’re most welcome! I’m glad it helped you.