
If you want to start a WordPress blog today, follow this official Step-by-Step Guide by WPBRAINERY. I came across many guides on starting a WordPress Blog. Even though I found many great guides, I also noticed that some major things were left unexplained.
I know how scary can it be to start a WordPress Blog, been there – done that. I was having the same questions you have now – 8 years ago. My knowledge about websites was lame. I didn’t know the difference between a domain and a hosting. There were times when I just wanted to give up.
I had no documentation to follow and learned most of the things the hard way. After I received more than 1000 questions about starting a WordPress Blog, I decided to create the most accurate step by step guide on how to start a WordPress blog.
What do you need to know before starting a WordPress Blog?
There are a couple of things you need to know when you decide to start a WordPress blog.
- Costs – Starting a WordPress blog is very cheap, but it’s not free. You need to purchase the hosting space and the domain name. The expenses are quite low, and you can get a well-performing server starting from $3.49/month.
- Niche – I’m sure you already know what your niche will be, but make sure that the internet is not already fed with the exact same thing. Do a little research before making a decision.
- Go through the WordPress Basics – I’ve seen many guides saying – “No knowledge required”. That couldn’t be more wrong. You don’t need to know coding, but understanding the basics will save your life later on. WordPress Codex is a good starting point.
No matter whether you are 18 years old or 70 years old, you can start a WordPress Blog within 10 minutes. But if you are still having second thoughts even after reading this guide, send us a message and we will help out the best we can.
What do I need to start a WordPress Blog?
There are a couple of essential things you need to start a WordPress blog.
- A domain name – Find the available domain name. Use our tool to find free domain names. Domain names are used in URLs to identify particular Web pages. For example, wpbrainery.com is a domain name. Domain name is the friendly naming system for giving addresses to web servers and web pages.
- A web hosting account – It’s the hard disk where your website will be stored. WPBRAINERY is hosted with InMotion Hosting and we got Exclusive Discounts for new WordPress Members signed up through WPBRAINERY.
Follow this link to get Discount on Hosting Plan for WordPress blog!
What you’ll get is a discounted domain name, FREE WordPress Setup, Powerfull WordPress Server, Exclusive Hosting Discount!
That’s all that take to start your WordPress blog in the next 30 minutes or less! We will walk you through Step by Step, sharing tips & tricks you won’t find anywhere else.

This tutorial covers:
- Avoid rookie mistakes
- Registering your domain name + Hosting Setup
- Login to your WordPress for the first time!
- WordPress Basics
- Using WordPress Themes
- Difference between Post and Page
- Assigning Categories to your Blog Posts
- How to write your first Blog Post
- Inserting your Logo
- Adding a Navigational Menu
- Adding Sharing Buttons to your Posts
- Configuring the Sidebar
- Installing WordPress Plugins
These steps will cover everything you need to start a WordPress blog without any fear.
Let’s start!
Avoid rookie mistakes
Choosing the wrong platform is the biggest mistake people make while starting a blog. If you’re new to WordPress and tech, you might get confused by the fact that there are two types of WordPress available. Learn the difference between WordPress.org vs WordPress.com.
For most users, WordPress.org is the right choice. This tutorial covers WordPress.org setup. WordPress.org is self-hosted WordPress, you need to install it and host it yourself.
WordPress.org software is completely free and open source platform. It is considered to be the most widely used platform for creating websites and blogs. According to the estimates, more than 35% of all internet sites are built with WordPress.org.
Why is it free? Because it’s built by a community of programming enthusiasts who are making improvements to the platform day by day.
Let’s repeat now – Only things you need is a domain name and hosting. A domain name usually costs up to $15/year and hosting packages can start from $5.99. By signing up for hosting through WPBRAINERY, you’ll get a discounted domain for the first year and discounted hosting price for WordPress hosting plan with InMotion Hosting. It’s an offer you don’t want to miss!
ButtonIf I haven’t mentioned it yet, InMotion Hosting has the highest reviews and support is simply awesome! It’s the #1 recommended hosting by WordPress Experts.
To keep in clear: We worked out a plan with InMotion Hosting to offer discounted prices to our readers who sign up through our referral link. We will earn a small commission from your sign up. Make no mistake, WPBRAINERY is a partner with 7 hosting providers, and we could have easily recommended any one of them, but when it comes to WordPress – InMotion Hosting offers the best value for money and that’s why we host there and recommend it for WordPress websites.
Registering your domain name + Hosting Plan
Let’s get your domain name and purchase the hosting plan. You can use our tool for finding available domain names or you can do it on InMotion Hosting during the checkout process.
To start, open InMotion Hosting website in a new tab by clicking here. You will see the discounted offers on hosting plans. LAUNCH and POWER plans are the most popular ones to start your WordPress blog. If you want even more performance, go for a PRO plan. That’s the plan we use.
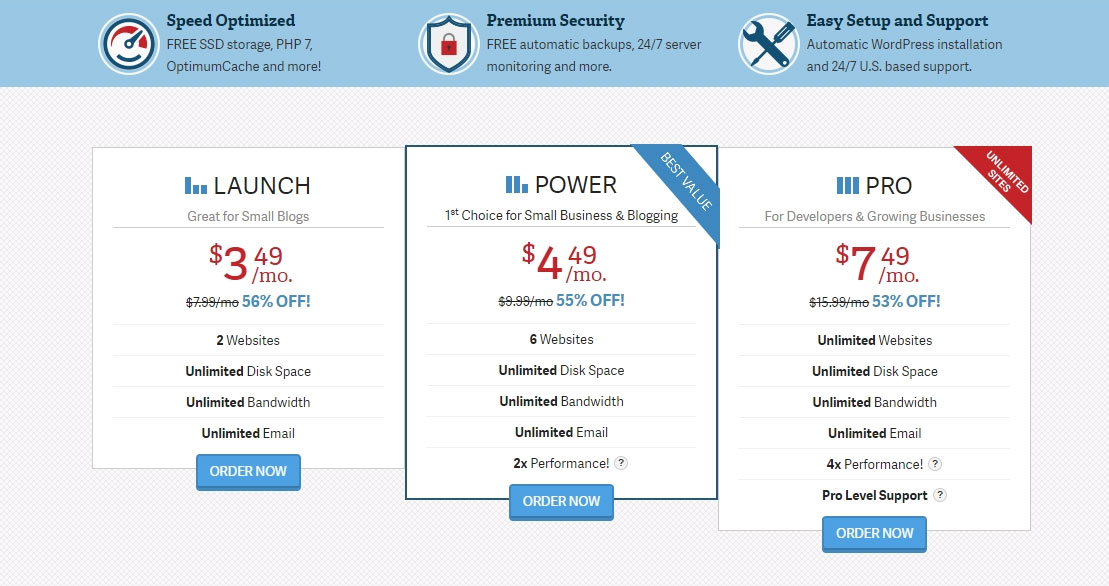
Point your mouse over “Order Now” button on selected plan and select the hosting period. We recommend going for a 1 year period. For PRO plan, you can even select 6 months but the price is a bit higher for shorter periods and you will hardly make any savings over selecting a 1-year plan.
Discounted domain and hosting price will be added to your cart.
NOTE: I came across some offers online, claiming to have a free domain. The thing is, the domain is much cheaper than the hosting plan, which has no discount. So by doing a simple math for 12 months period, your savings are better by having a discounted hosting plan. But we also managed to get you discounted domain which usually costs $15/yr – our offer is $11.99/yr, plus a whopping discount of $71.94 on POWER hosting plan!
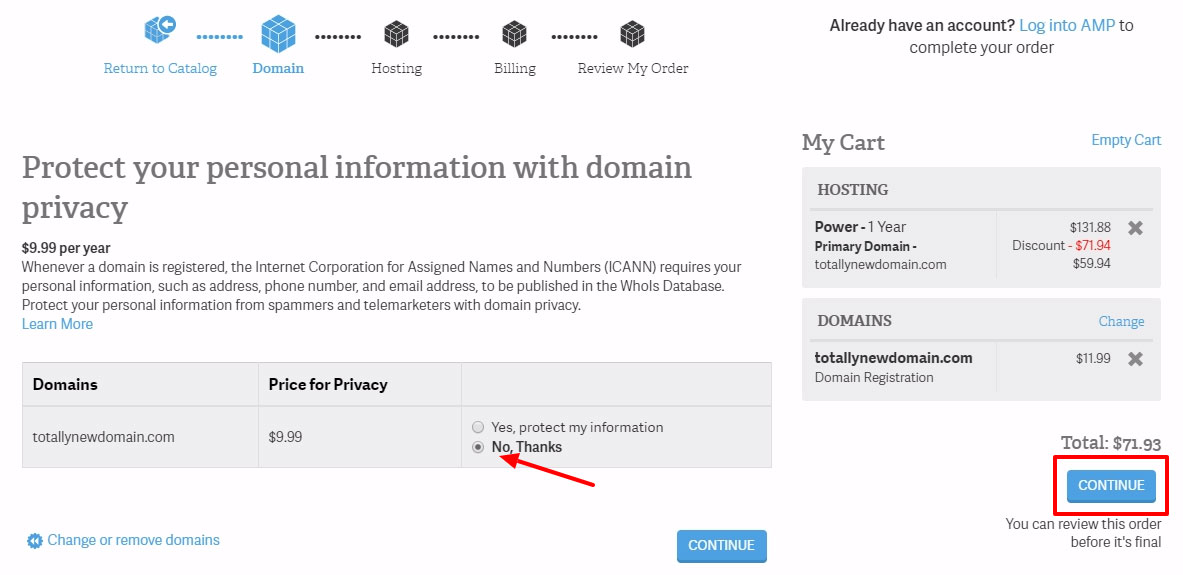
After you add your domain to the cart, you can optionally remove “Domain Privacy”. Domain name Privacy is a service offered by InMotion hosting that protects your personal information from the information harvesting efforts of spammers, direct marketers, and even identity thieves.
When a customer purchases domain privacy, the public information records for the domain name are replaced with InMotion information. This includes an email address, phone number, and physical address. The only thing that is not changed is the Organization Name, as that is the legal owner of the domain.
Click Continue.
If you removed Domain Privacy in the previous step, you’ll probably be prompted again. Select “No thanks” if that’s your choice and click Continue.
WordPress Hosting Configuration
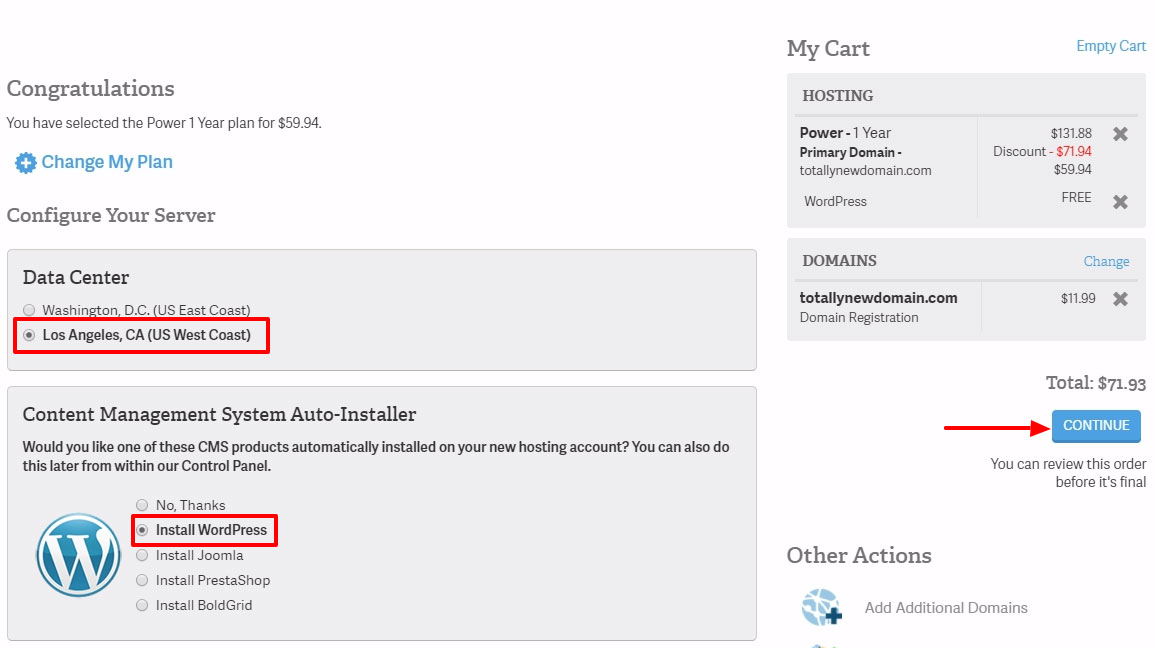
Next step is to Select a Data Center. You may choose any from the list. This won’t impact your WordPress site in any way. This is a physical location of your server.
Remember the Free WordPress installation service? You may choose to have it preinstalled with absolutely no knowledge required. If you choose “No Thanks” and wish to install the WordPress yourself (which might have some advantages), you can read our guide on how to install WordPress manually.
To start a WordPress blog in a quick and easy way, select “Install WordPress” from the radio buttons. Image below.
On the next step, you will need to enter the email address for your new hosting account. Type in your email and hit Continue.

After you clicked Continue, it is time to enter account and billing information. Fill in all the boxes on this page, select your payment method and hit “Review My Order”

That’s it! You have successfully purchased your hosting and domain and you can start a Wordpress blog in a few minutes!
Email Confirmation
You will receive a similar Welcome Email from InMotion Hosting.
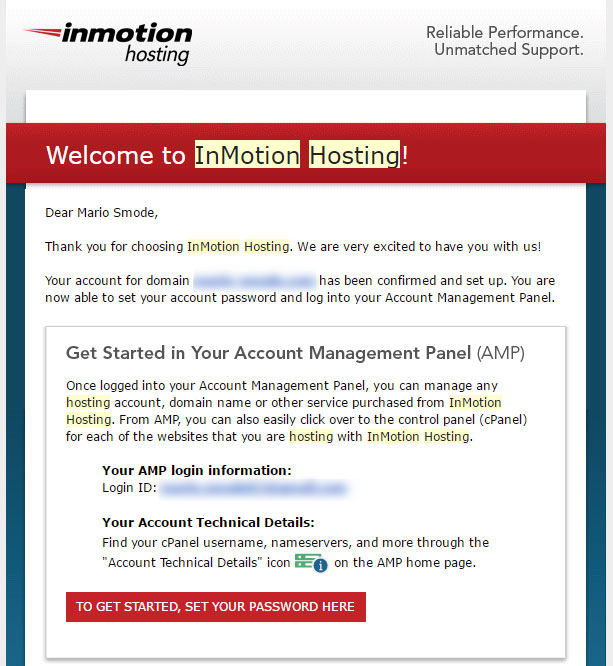
This email will contain your login credentials to InMotion Dashboard. Click “To get started, set your password here”
At the bottom of the email, you will also find your WordPress login username, password and a link to your WordPress Dashboard.

Congratulations, you have purchased your first hosting plan and installed WordPress!
Login to your WordPress for the first time!
At this point, you are probably excited as I was for the first time! To continue, follow the link from your email. It will look something like http://yourdomain.com/wp-admin.
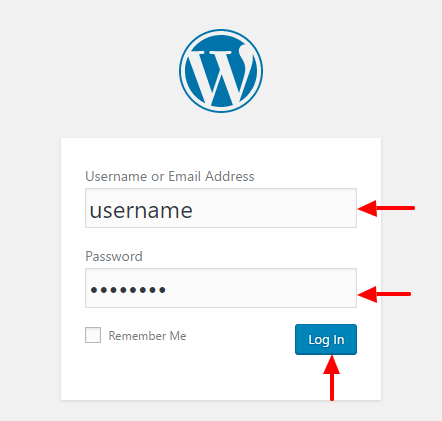
Type in your Username and password you got in your email and you’ll be taken to your WordPress Dashboard.

Let’s explain a few things. Most of the tutorials jump right to Theme installation, but I think it’s important that you learn the basics before. On the image above, two areas are marked with 1. and 2.
- This is your main Dashboard area. ALL the settings for your WordPress blog are being handled from here. Changing Themes, installing Plugins and accessing plugins settings – all will be in this area on the left.
- The top area marked as 2. is called WP-Admin bar. The wp-admin bar consists of a few shortcuts like Previewing your website, accessing your WordPress account info and may contain various icons depending on the plugins you have installed. One important thing to mention to new users is that this area is VISIBLE ONLY TO YOU as admin of the site.
WordPress Basics
Looking at the dashboard, you might find yourself lost within all the options available. Don’t worry. WordPress is made in a way to be easy for beginners.
What is Sidebar?
Sidebar is a theme feature introduced with Version 2.2. It’s basically a vertical column provided by a theme for displaying information other than the main content of the web page. Themes usually provide at least one sidebar at the left or right of the content. Sidebars usually contain widgets that an administrator of the site can customize.
What are Widgets?
WordPress Widgets add content and features to your Sidebars. Examples are the default widgets that come with WordPress; for Categories, Tag cloud, Search, etc. Plugins will often add their own widgets.
What is a Theme?
Fundamentally, the WordPress Theme system is a way to “skin” your weblog. Yet, it is more than just a “skin.” Skinning your site implies that only the design is changed. WordPress Themes can provide much more control over the look and presentation of the material on your website.
Using WordPress Themes
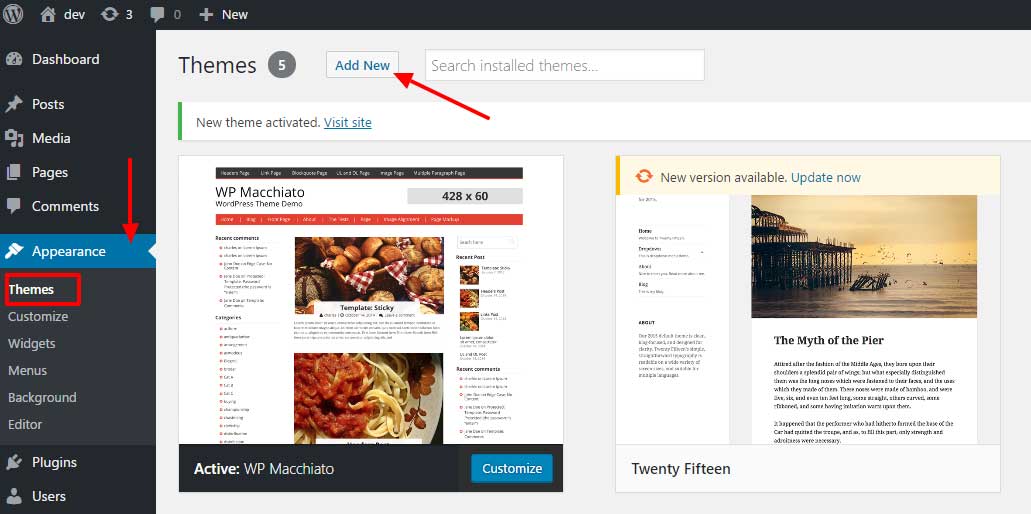
By default, WordPress comes preinstalled with a couple of themes. Most likely, your default theme is called Twenty Seventeen. This theme is good enough to start your WordPress blog, but if you wish to install a different theme, you can do that under Appearance -> Themes.
You may also want to check some premium themes on Themeforest, marketplace for WordPress premium themes.
Difference between Posts and Pages
Probably the first question that comes to your mind is the difference between Posts and Pages.
In WordPress, you can put content on your site as either a “post” or a “page”. When you’re writing a regular blog entry, you write a post. Posts, in a default setup, appear in reverse chronological order on your blog’s home page.
In contrast, pages are for non-hierarchical content: pages like “About” or “Contact” would be common examples. Pages live outside of the normal blog chronology and are often used to present timeless information about yourself or your site — information that is always relevant. You can use Pages to organize and manage the structure of your website content.
Assigning Categories to your Blog Posts
The general topic the post can be classified in. Generally, bloggers have 7-10 categories for their content. Readers can browse specific categories to see all posts in the category. To add a new category, click the “+Add New Category” link in this section. You can manage your categories by going to Administration Panels > Posts > Categories.
How to write your first Blog Post
- Log in to your WordPress Administration Panel (Dashboard).
- Click the ‘Posts’ tab.
- Click the ‘Add New’ sub-tab.
- Start filling in the blanks: enter your post title in the upper field, and enter your post body content in the main post editing box below it.
- As needed, select a category, add tags, and make other selections from the sections below the post. (Each of these sections is explained below.)
- When you are ready, click Publish.
Inserting your Logo
Inserting your logo is theme specific. Usually, premium themes are having a very good framework and a vast set of options to choose. In most cases, premium themes are easier to manage than the free WordPress themes.
In the step above, we installed and activated theme WP Macchiato. To add the logo to that specific theme, navigate to Appearance > Customize.
A new page will open with a sidebar on the right. Find the item “Site Logo”, click “Select Image” and upload a logo file from your computer.

If you’re happy with the looks, hit “Save & Publish”.
Adding a Navigational Menu
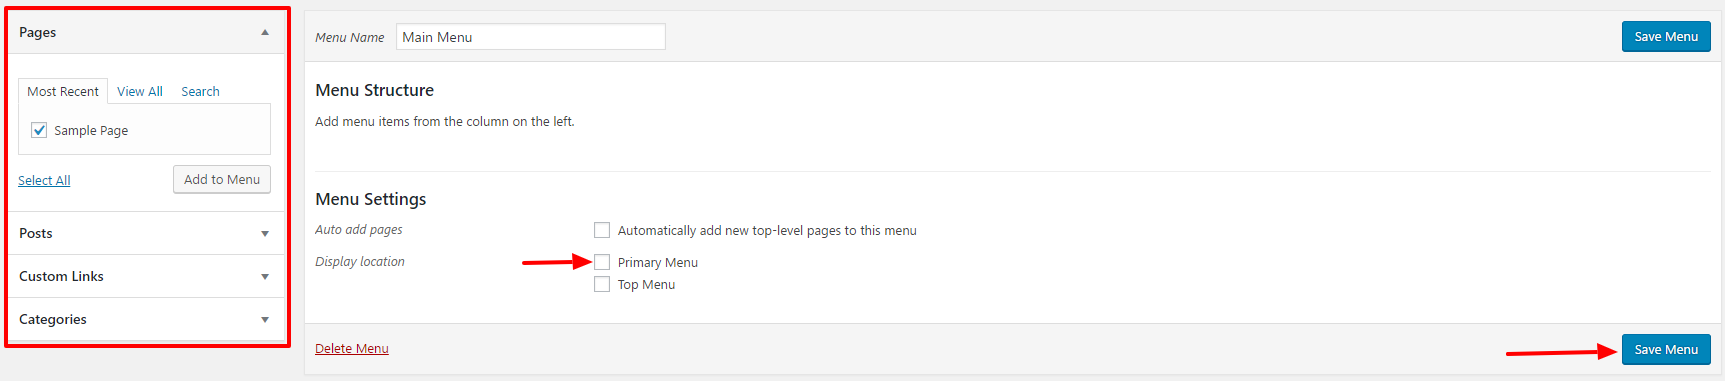
To allow users to easily navigate on your site, you need to have a Navigation menu. To create one, go to Appearance > Menus

Type in your Menu Name and hit Create Menu.
You can add different link types into your menu, these are split between panes left of the menu you’re currently editing.
- Locate the panel entitled Pages.
- Within this panel, select the View All link to bring up a list of all the currently published Pages on your site.
- Select the Pages that you want to add by clicking the checkbox next to each Page’s title.
- Click the Add to Menu button located at the bottom of this pane to add your selection(s) to the menu that you created in the previous step.
- Tick the location of your menu
- Click the Save Menu button once you’ve added all the menu items you want.
 Adding Sharing Buttons to your Posts
Why going through all this trouble if you can’t share your posts easily and most importantly, let others share it. Most of the premium themes are having the sharing buttons included. But if they don’t, you could install a plugin like Social Warfare to get your sharing buttons on your posts.
To install a new plugin, go to Plugins > Add New. Type in the plugin name in the search bar.
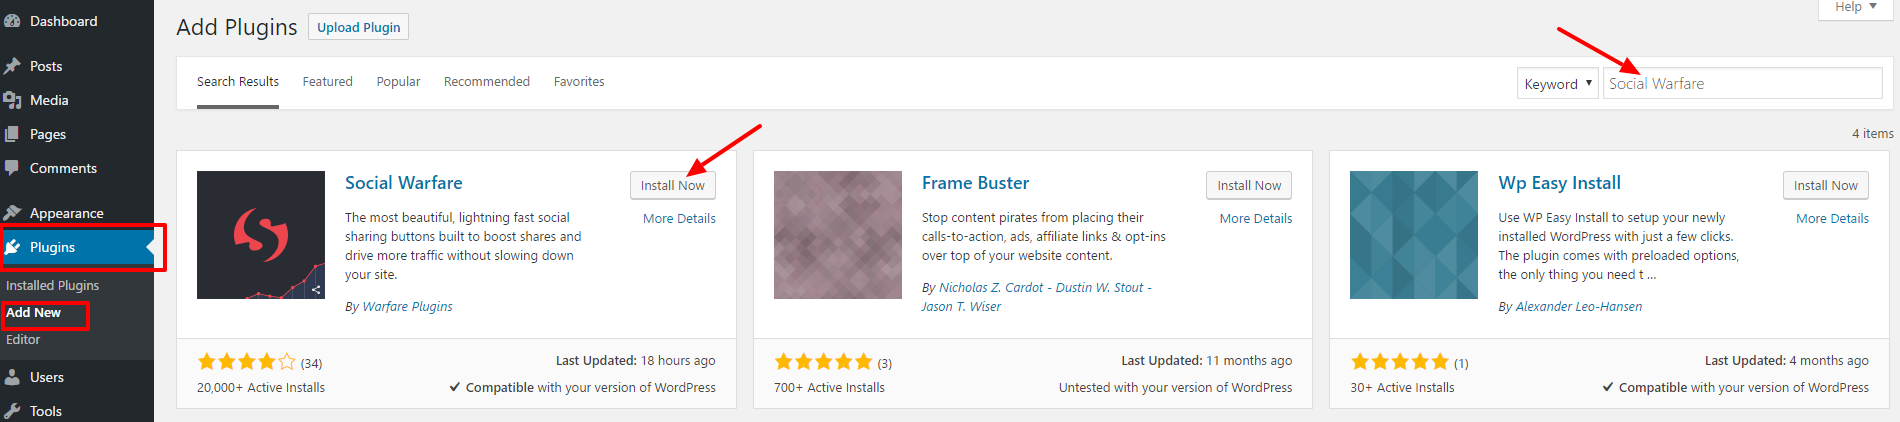
Once you found the plugin, click “Install Now” > then “Activate”. You will see a new Menu Item in your Dashboard. To adjust the settings of Social Warfare, just click on the menu item.
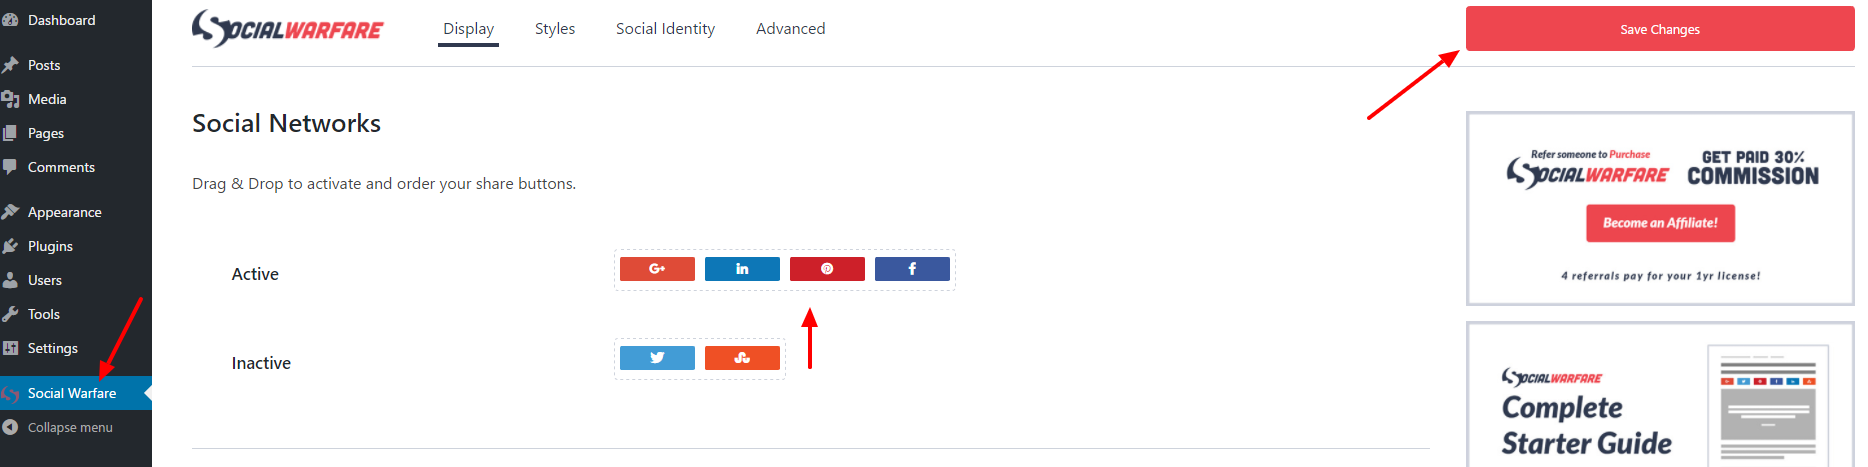
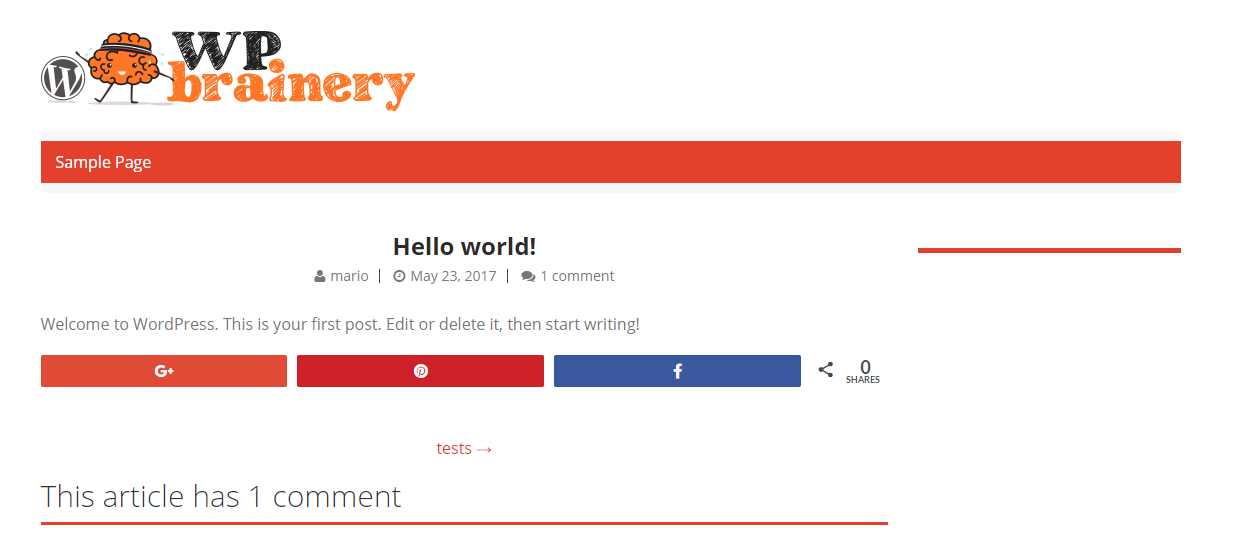
The setup is simple. Simply drag the social icons from the Inactive area to the Active area. Settings are self-explanatory, go through each setting item and adjust it per your preference. Once you’re done, hit Save.
There you go! You have the fully functional first Post!
Configuring the Sidebar
I’ve explained above what Sidebar is. Now, let’s add some items to our sidebar. Navigate to Appearance > Widgets

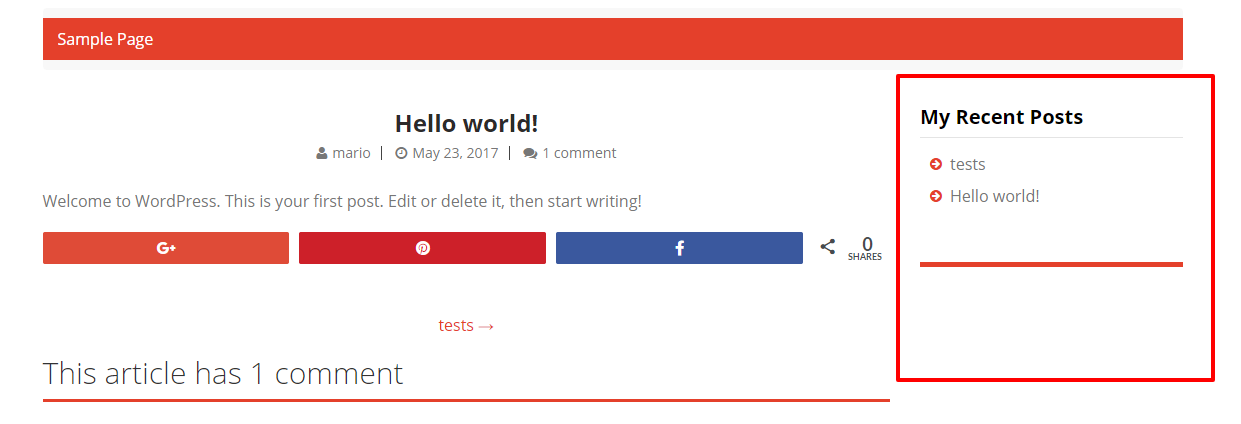
Widget types will depend on the theme and plugins you have installed. For this tutorial, we will add Recent Post Widget to our right Sidebar. Sidebar names are theme specific.
Simply drag the widget to the desired sidebar area, fill in the name and hit Save.
Congratulations! You have set up your WordPress blog!
Once you have written your first blog post, you probably want to get started with adding other usual elements on your website such as a contact form, about page, and more.
To further customize WordPress and add features like contact forms, galleries, sliders, etc, you need to use WordPress plugins.
Conclusion
After following the steps above, you should be able to start a WordPress blog under 30 minutes. Don’t miss our special promotion on InMotion Hosting Wordpress plans.
Our goal is to create an understandable step by step WordPress Tutorials, which are accurate and up to date, easy enough to be used by small businesses, bloggers and everyone not so geeky and knowledgeable.
If you liked this article, make sure to share it on social networks to help others like you to start a WordPress blog.
Kate Brownell
August 24, 2018 | 4:25 am
Excellent information. You have shared everything beautifully. I am a beginner, I want to create a blog for making extra income online. But I don’t have any logo. I just want to share my travel experience in this blog. I have pictures captured in my camera. In future I want to do affiliate marketing. If I don’t use logo will it affect the affiliate marketing?
Summayah Mahnoor
June 22, 2019 | 6:46 am
The blog is very useful